Share Videos and Knowledge Seamlessly
If your business uses Microsoft 365, you’ve already got access to a powerful (and often overlooked) tool: Microsoft Stream.
Think of it as your organisation’s private YouTube — a secure, integrated space to record, upload, share, and manage videos across your team.
Whether you’re onboarding new hires, sharing leadership updates, or recording training sessions, Stream makes it easy to keep everyone informed and engaged.
What Is Microsoft Stream?
Unlike public platforms like YouTube, Stream keeps everything secure within your organisation.
It’s been around since 2017, but it’s evolved dramatically – especially in 2024 when it became fully embedded across all Microsoft 365 apps, and now in 2025 as it merges with Clipchamp for enhanced video editing capabilities.
- Record and watch Teams meetings (with transcripts)
- Upload and share videos securely
- Organise content into playlists
- Embed videos in SharePoint or Teams
- Add captions, chapters, and comments
- Track engagement with built-in analytics
Why use Stream?
Here’s the thing – if you’re already using Microsoft 365 Business Standard or Premium, you’ve already got Stream.
You’re literally paying for it whether you use it or not. For small and medium-sized businesses, Stream can be a game-changer.
Here’s how you can use it successfully:
| Use case | Description |
|---|---|
| Onboarding | Create a playlist of welcome videos, HR policies, and training modules. |
| Leadership updates | Share CEO messages or company-wide announcements. |
| Team collaboration | Let departments upload and share knowledge in private Teams channels. |
| Company-wide sharing | Build a central video portal using SharePoint for everyone to access. |
Four Key Ways SMBs Use Stream
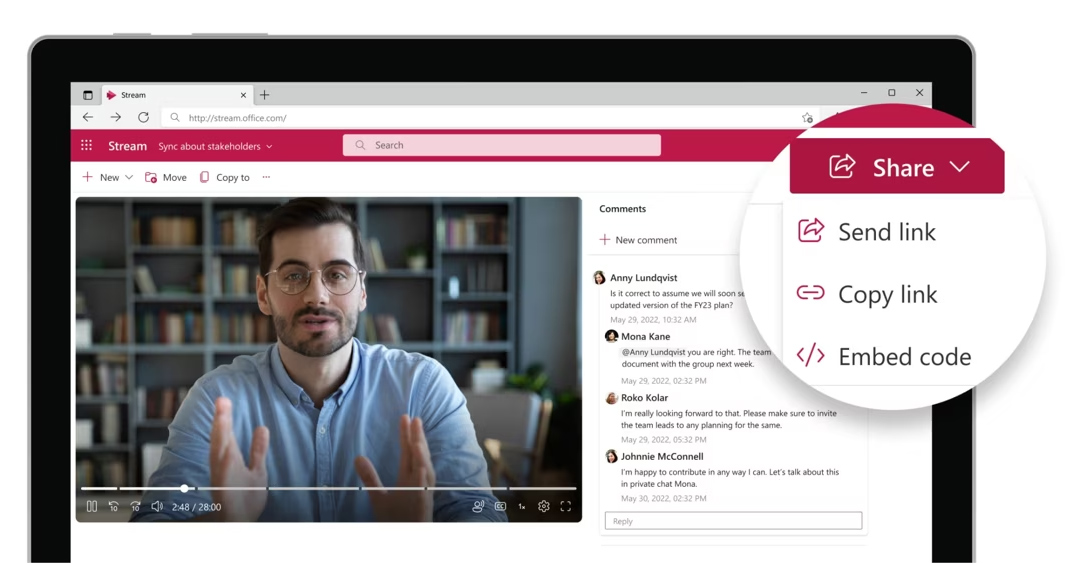
Simple Video Sharing Need to share a quick tutorial with your team? Upload it to Stream and share the link. It’s that straightforward.
Top-Down Communication Perfect for leadership messages, HR announcements, or company-wide updates. Your CEO can record a message, and everyone can access it securely.
Team Collaboration Create department-specific video libraries where only team members can view and contribute content.
Training and Onboarding Build comprehensive video libraries for new employee onboarding or ongoing training programmes.
Getting Started: Your First Steps with Microsoft Stream
Accessing Stream
There are two main ways to access Stream:
Direct Access: Go to stream.microsoft.com and sign in with your Microsoft 365 credentials
Through Microsoft 365: Click the waffle menu (nine dots) in the top-left corner of any Microsoft 365 app, then find Stream in your app list
Note: If you have Copilot, you’ll find the apps button at the bottom of the left-hand menu.
Understanding the Homepage
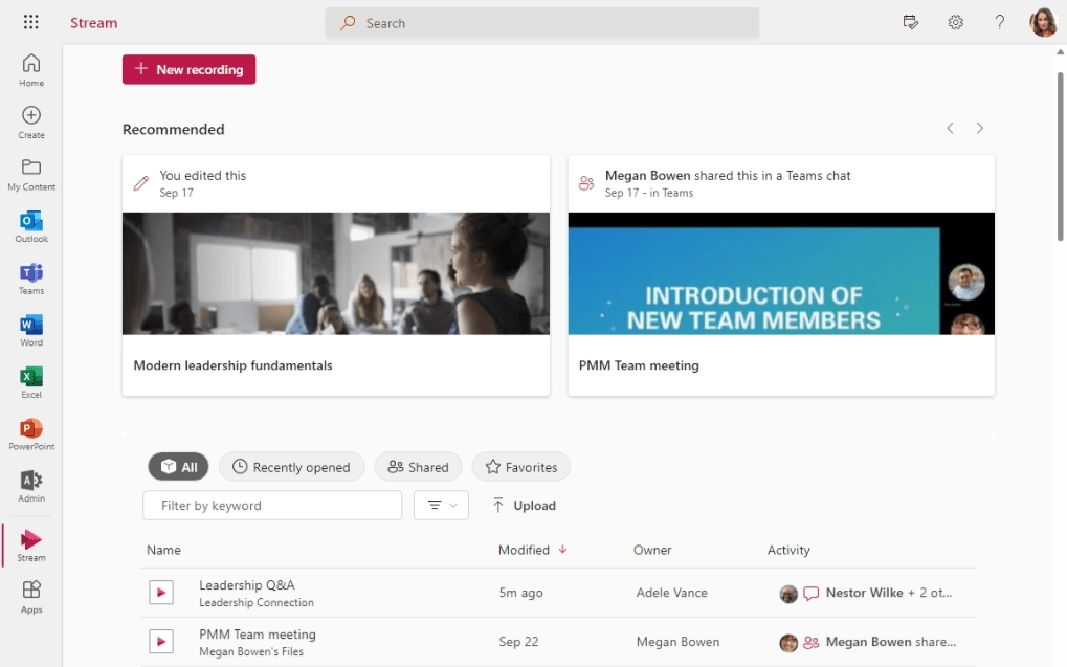
The Stream homepage is your command centre. Here’s what you’ll see:
Quick Actions: Upload videos, record your screen, record from your camera, or create playlists
Filtering Options: Sort by videos created by you, meetings, playlists, shared videos, and favourites
View Options: Switch between list view and grid view for easier browsing
Search Function: Find videos by keyword, meeting names, or other criteria
How to Upload and Share Videos: A Step-by-Step Guide
Uploading Your First Video
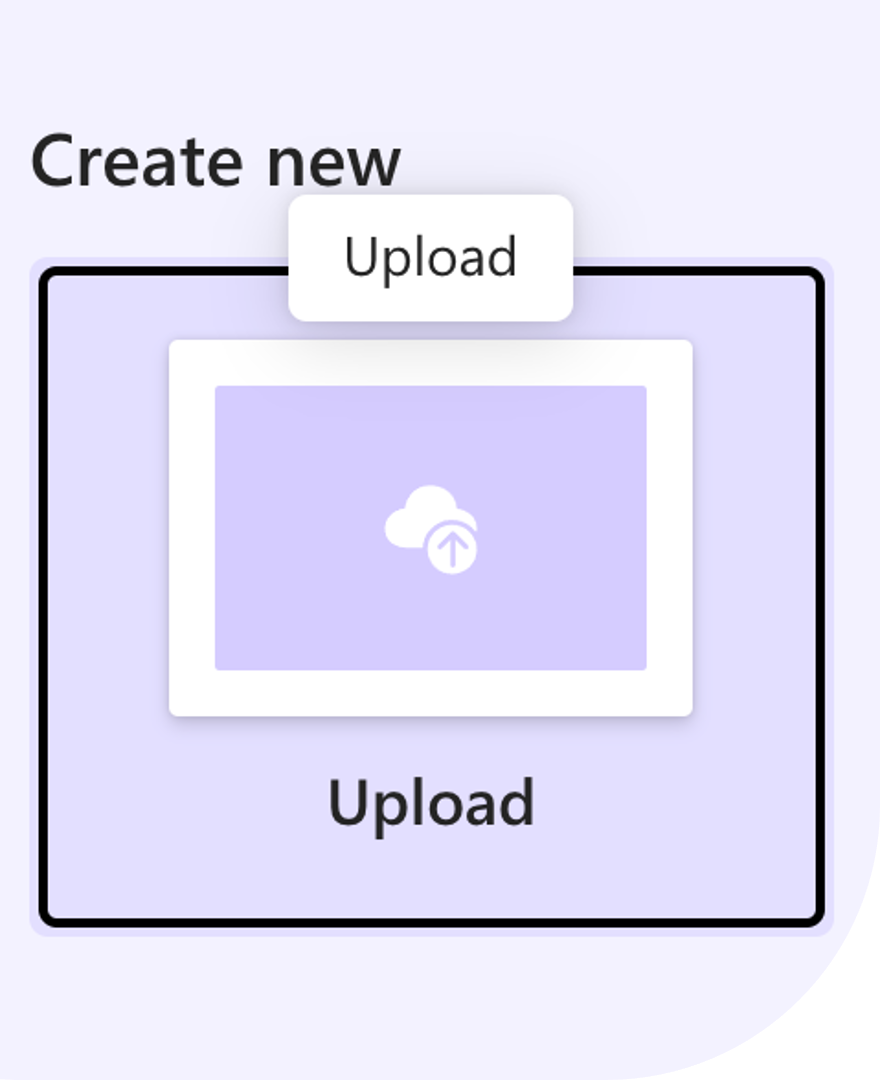
- Click “Upload” on the Stream homepage
- Select your video file from your computer
- Wait for the upload – you’ll see a progress indicator in the bottom-right corner
- Click “Open” when the upload completes to add details
Sharing Your Video
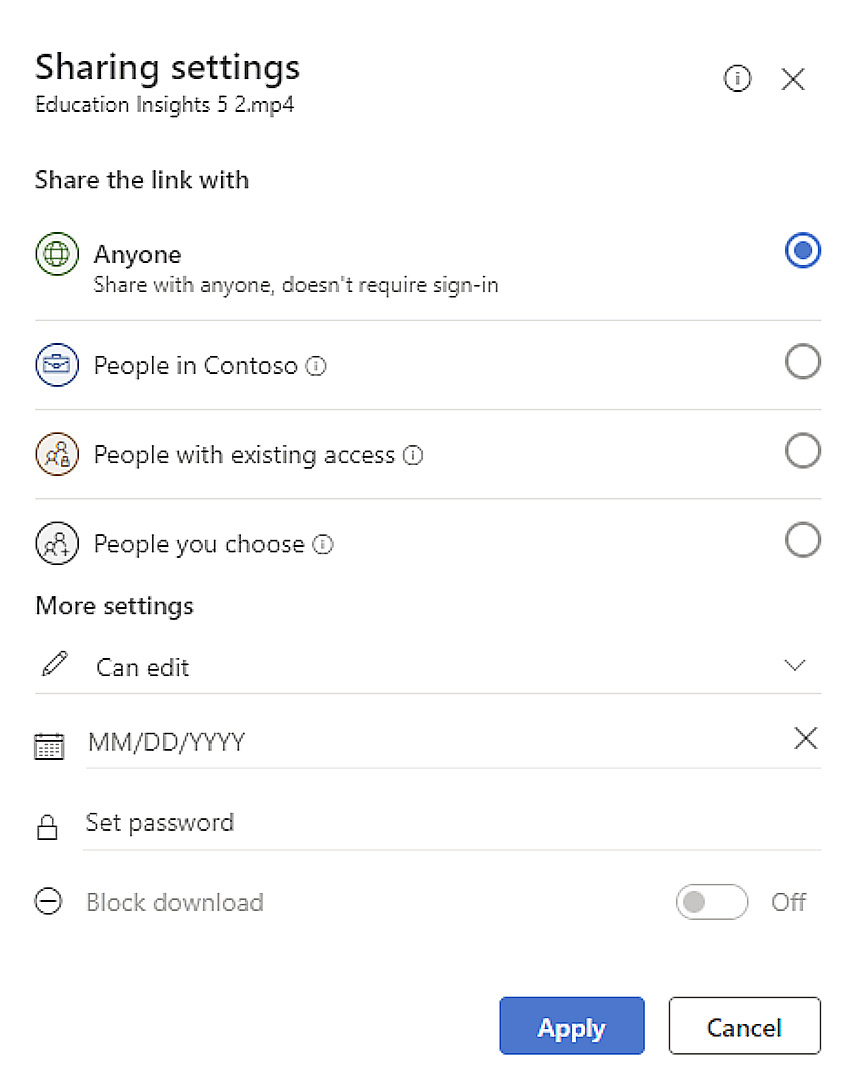
Stream uses the same sharing system as other Microsoft 365 apps:
- Click the three dots next to your video
- Select “Share”
- Choose permissions: View, comment, or edit
- Set link settings: Organisation-wide or specific people
- Add an optional message
- Set expiration dates if needed
Optimising Your Video
Optimising your video by thoughtfully using features such as descriptions, thumbnails, and categorisation options is essential for maximising its impact.
Clear descriptions and relevant keywords make your content easier to find, while engaging thumbnails and organised playlists attract viewers’ attention and encourage them to click and watch. By taking these simple steps, you ensure your recordings are more accessible, discoverable, and valuable to your intended audience.
Once uploaded, you can enhance your video:
Add a Description
- Click on your video to open it
- Scroll down to the description area
- Add context, links to relevant documents, or instructions
- Use the formatting tools for bullets, bold text, or links
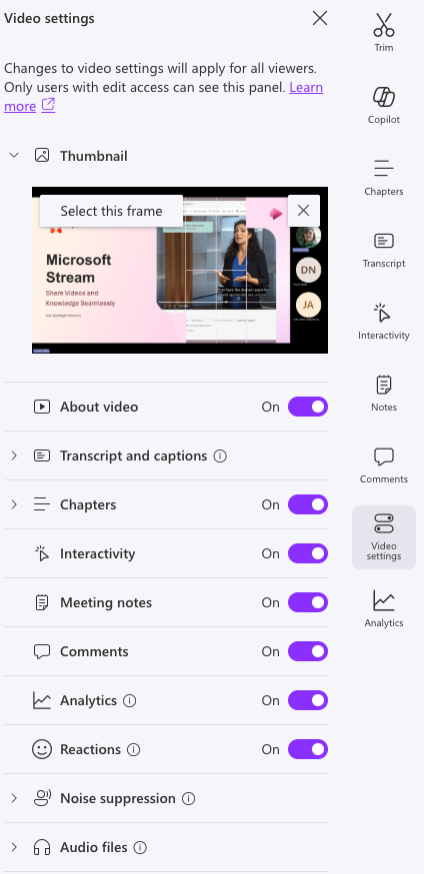
Choose the Right Thumbnail
- Go to Video Settings
- Stream automatically selects a thumbnail, but you can change it
- Upload a custom image or select a frame from your video
Enable Transcripts and Captions
- Turn on transcript generation for accessibility
- Enable captions for viewers who need them
- Stream automatically generates these, though it may take some time
Set Up Analytics
- Enable analytics before sharing to track views and engagement
- View detailed statistics similar to YouTube analytics
- See where viewers drop off to improve future content
Next Steps: Recording meetings and organising a video library
Recording Meetings: Capturing Knowledge Automatically
One of Stream’s most powerful features is its integration with Teams meetings.
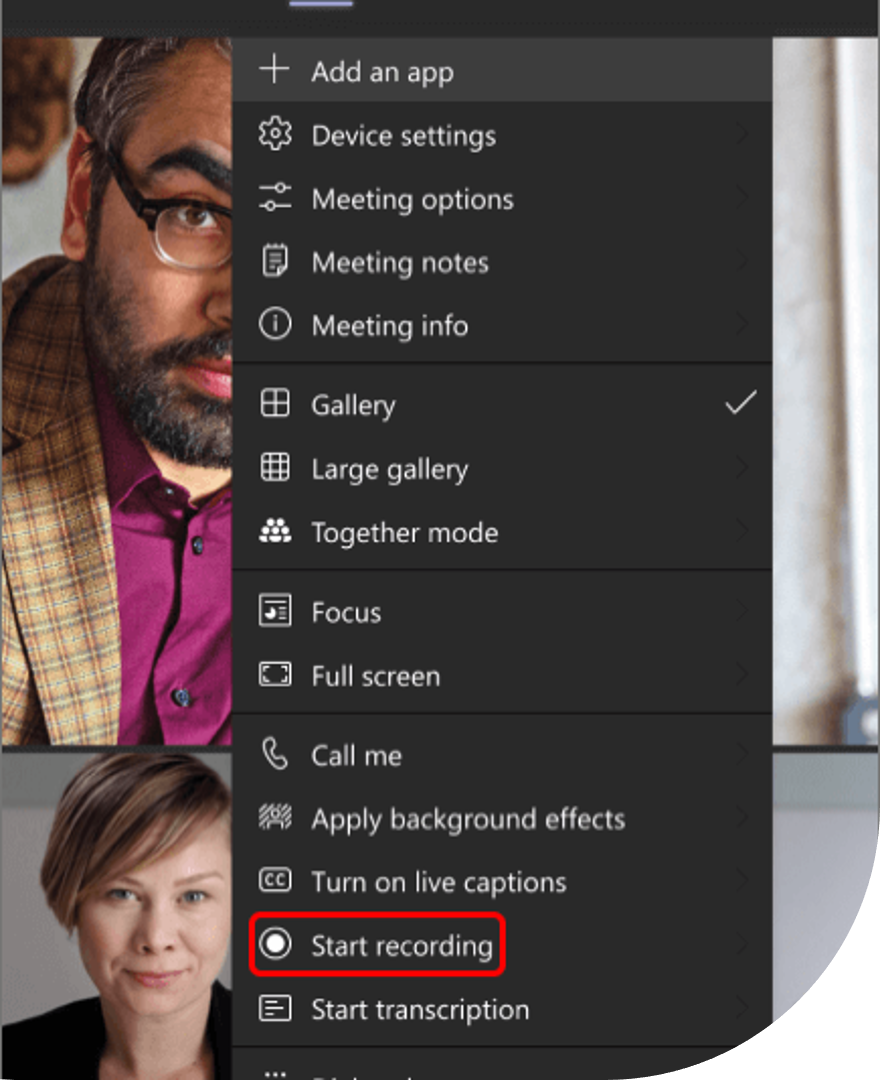
Recording a Teams Meeting
- Join your Teams meeting as usual
- Click the three dots in the meeting toolbar
- Select “Record and transcribe”
- Choose your options: Start recording, start transcription, or both
- All participants will be notified when recording begins
Accessing Meeting Recordings
After your meeting ends:
- Check Teams chat for a notification that your recap is ready
- Click “View recap” to see the recording
- Find automatic chapters if you had an agenda
- Review the transcript with speaker identification
- Share the recording using the same sharing options as uploaded videos
Important: By default, most meeting recordings expire after 538 days and move to the trash bin. You’ll get an Outlook notification before this happens, and you can change the expiration date in Stream.
How to create a Playlist
- Click “Create playlist” on the Stream homepage
- Give your playlist a name and description
- Choose where to save it: Your lists or a Teams channel
- Add videos by clicking “Add new items”
- Arrange videos in your preferred order
Pro Tip: Playlists use SharePoint Lists technology, so they integrate seamlessly with your existing Microsoft 365 workflows.
Recording Your Screen
Stream includes a powerful screen recording tool that’s perfect for creating tutorials or demonstrations.
- Click “Screen recording” on the homepage
- Choose what to record: Entire screen, specific window, or browser tab
- Enable system audio if your content includes sound
- Position your camera (appears as a small window you can move around)
- Click record and follow the countdown
Enhanced Recording Features
Teleprompter: Add your script and have it scroll while you record – perfect for consistent messaging.
On-Screen Tools: Add text, draw on the screen, or include stickers and filters.
Editing Options: Trim, split, or delete sections of your recording before uploading.
Tips for Maximising Engagement and Accessibility
Make Your Videos Accessible
Crafting videos that are accessible to all audiences is crucial for maximising both their reach and impact.
By enabling captions and generating searchable transcripts, you ensure that every viewer—regardless of hearing ability—can engage with your content. Clear, descriptive titles and comprehensive video descriptions, enriched with relevant links, further support discoverability and understanding. Together, these practices lay a strong foundation for content that is both inclusive and easy to navigate, setting the tone for a more engaging and accessible video experience
Boost Engagement
- Create compelling thumbnails that accurately represent your content
- Use chapters to break up longer videos
- Enable comments to encourage interaction
- Add interactivity with call-outs and links to relevant documents or forms
Organisational Best Practices
- Establish naming conventions for easy searching
- Create departmental playlists for organised content
- Set appropriate permissions for different types of content
- Use analytics to understand what content performs best
Working Across Microsoft 365
Stream isn’t just a standalone app – it’s integrated throughout Microsoft 365:
- Teams: Access Stream directly from Teams with the Stream app
- SharePoint: Embed videos in SharePoint pages
- OneDrive: Videos sync across your OneDrive
- Outlook: Share Stream links directly in emails
The Future of Stream
Microsoft is continuously improving Stream.
The recent merger with Clipchamp means you’ll soon have enhanced video editing capabilities built right into Stream. This makes it even more valuable for SMBs looking to create professional-quality content without additional software costs.
The beauty of Microsoft Stream is that if you’re already using Microsoft 365 Business Standard or Premium, you’ve got everything you need to start.
Microsoft Stream transforms how SMBs share knowledge, conduct training, and communicate internally.
It’s secure, integrated, and included in your existing Microsoft 365 subscription. The question isn’t whether you should use it – it’s how quickly you can start leveraging this powerful tool to improve your business communications.
Ready to get started?
Log in to your Microsoft 365 account and give Stream a try. Your team will thank you for making knowledge sharing so much easier.


